Connect lobstr.io to Make and automate your scraping workflows
Use the official lobstr.io app in Make to launch runs, watch for completed runs, and push scraped results into any of the thousands of apps Make connects to.
lobstr.io has an official app in Make. Once connected, you can launch runs from a Make scenario, wait for a run to finish, and pipe the results straight into a CRM, a spreadsheet, a database, Slack, or anything else Make supports — without writing code.
The Make app runs batches, which it calls Squids, their name in the API v1. To run an operation instead (one call, its records back at once), use the HTTP app's Make a request module: POST https://api.lobstr.io/v2/run with the header Authorization: Bearer <your API key> and a JSON body such as {"source": "google_maps", "operation": "places/get", "options": {"place": "Le Bouchon des Filles, Lyon"}}. Every operation's options are in the API docs.
Before you start
- A lobstr.io account with credits.
- A Make account.
- Your lobstr.io API key, which is what the connection authenticates with.
Your API key lives in the dashboard under the API menu — click Copy to grab it.
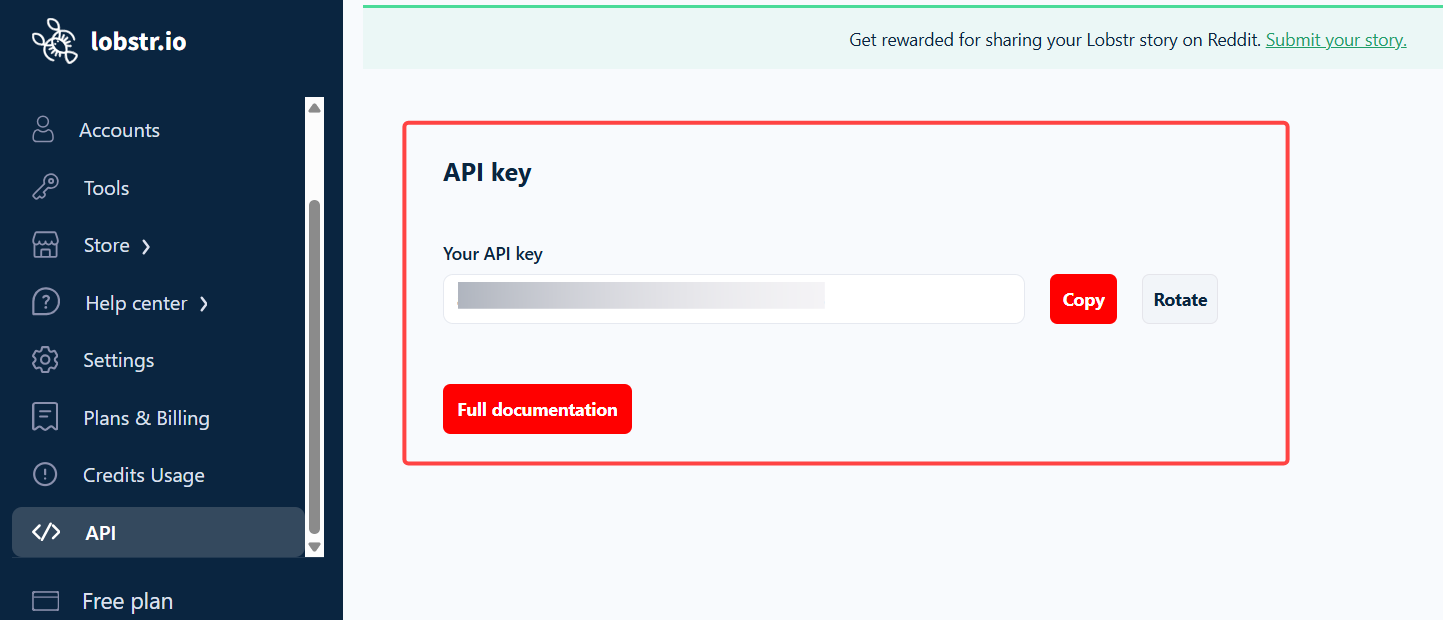
See how to find your API key for more detail, including how to rotate it.
Create the connection
- Add a lobstr.io module
In your Make scenario, click the + button and search for lobstr.io. The app appears as LOBSTR.IO in Make's interface. Pick any module — the connection is shared across all of them.
- Create a connection
In the module settings, click Add next to the Connection field.
- Paste your API key
Give the connection a name, paste your lobstr.io API key into the API Key field, and click Save.
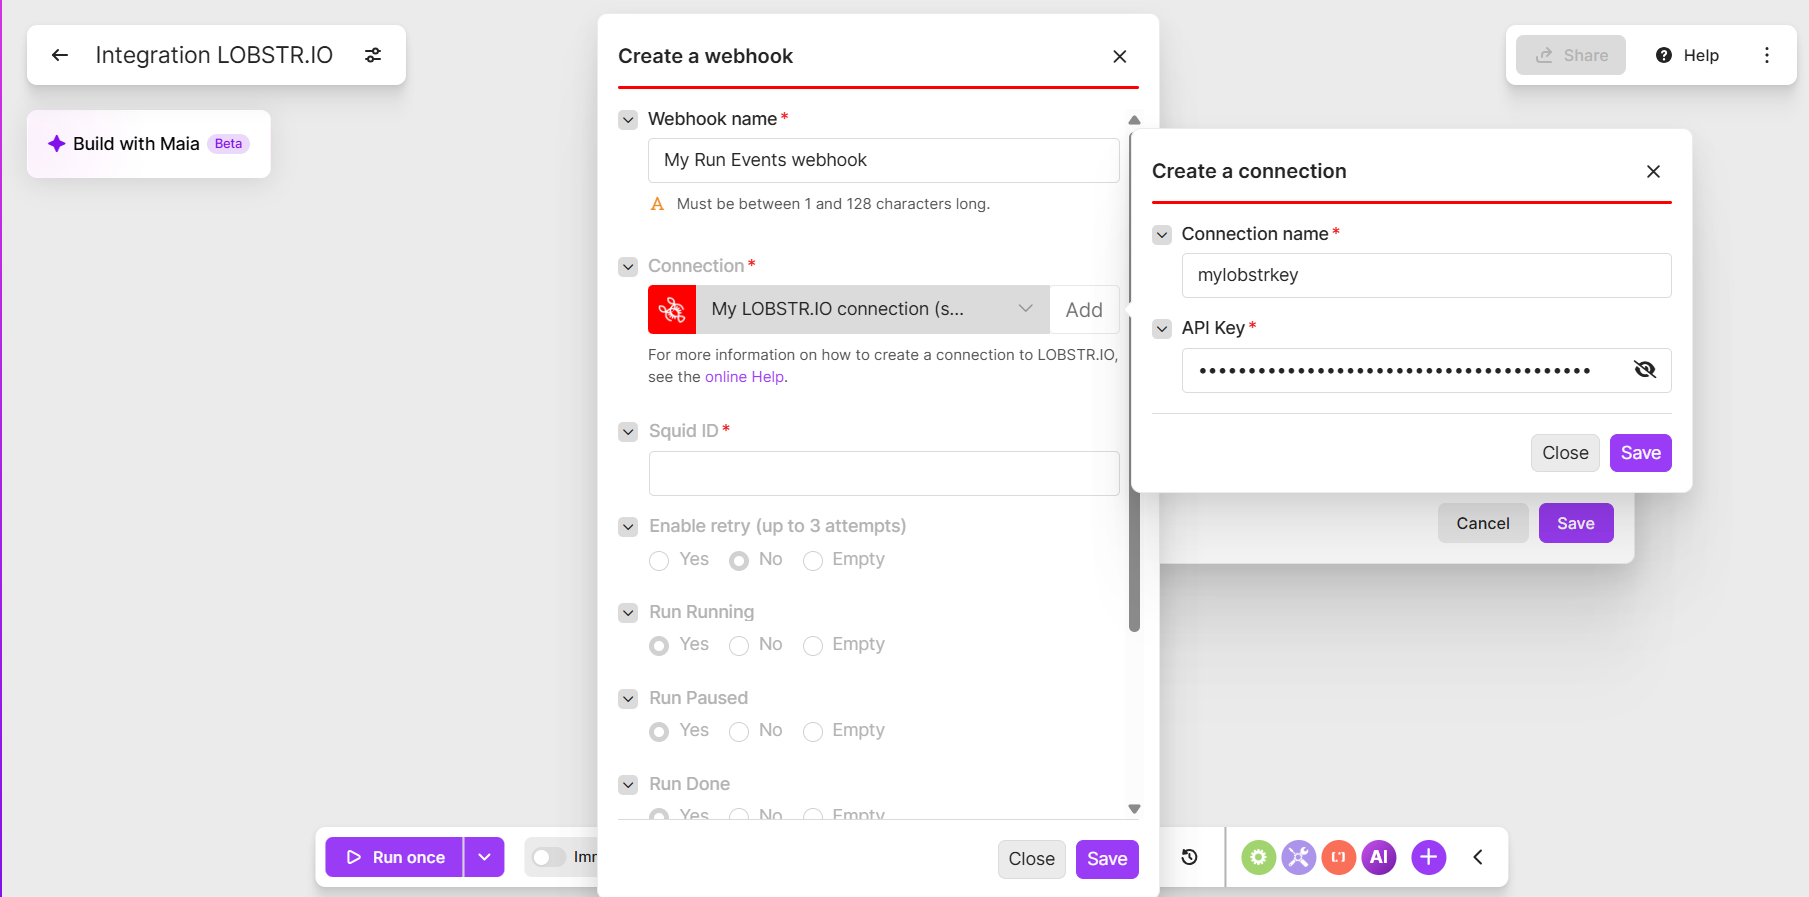
Make verifies the key immediately. Once saved, every lobstr.io module in your account can reuse the same connection.
Your API key grants full access to your lobstr.io account. Treat it like a password — never paste it into a shared scenario description or a public template.
What the lobstr.io app can do
| Module | Type | What it does |
|---|---|---|
| Watch Runs | Trigger | Triggers when a run is finished, failed, or has changed status |
| Launch a Run | Action | Launches a new run for a selected batch |
| Get a Squid | Search | Retrieves details of a specific batch, including its name, crawler, and parameters |
| List Squids | Search | Lists your saved batches, with pagination |
| List Runs | Search | Lists all runs for a specific batch |
| List Results | Search | Returns structured results from a run or a batch, with pagination and optional task filtering |
| Make an API call | Other | Performs a custom API request — you specify the method, path, and optional JSON body |
Make an API call is the escape hatch. If you need something the dedicated modules don't cover — adding tasks, aborting a run, changing batch settings — use it with the endpoint path and a JSON body.
Two scenarios worth building
Push results somewhere the moment a run finishes
This is the most common setup, and it replaces the download-and-import loop entirely. Here's the whole loop end to end:
- Add the Watch Runs trigger
Start the scenario with Watch Runs. Click Add to create a webhook: name it, pick your connection, and enter the Squid ID of the batch you want to watch.
Then toggle the events you care about — Run Done on its own is what most scenarios want. You can also enable retry, which reattempts failed deliveries up to 3 times.
The batch ID is typed in, not picked from a list. It's the hash in the batch's dashboard URL.
- Copy the webhook URL
Once saved, the module shows a Webhook URL that starts with
https://hook.— click the copy button beside it.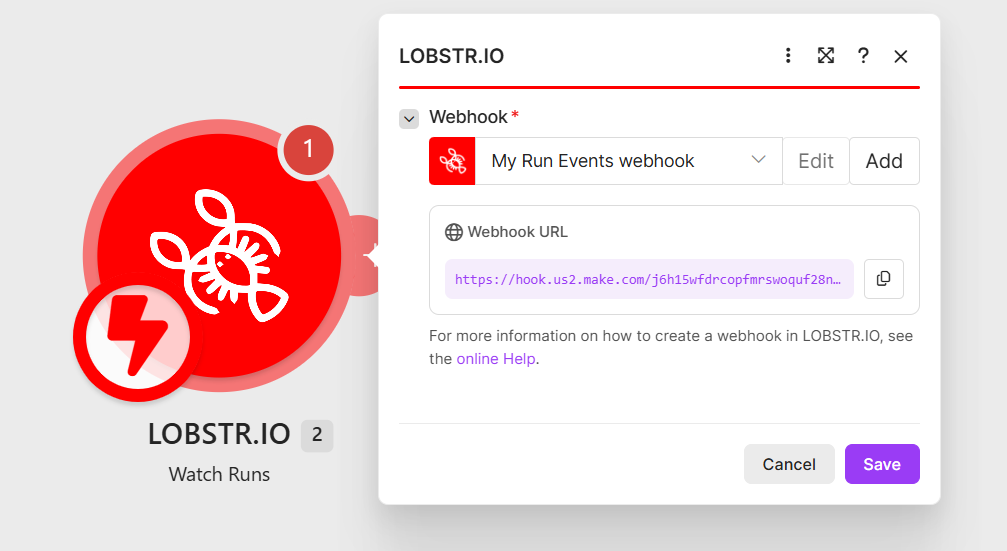
- Add the webhook URL to your batch
Go to your batch in lobstr.io, open the Delivery panel, expand the Webhook section, and paste the URL in. Tick the checkbox to activate it and click Save.
This step is manual and easy to miss. Creating the webhook in Make does not configure delivery on your batch — until you paste that URL into the Delivery panel and save, the scenario will never fire.
- Fetch the rows
Add List Results and map the run ID from the trigger into it. This returns the rows from that run only.
- Send the data on
Add whatever destination you need — a CRM record, a Google Sheets row, an Airtable record, a Slack message. Map the lobstr.io fields onto the destination's fields.
If all you want is the data in a spreadsheet, you don't need Make at all — lobstr.io can export to Google Sheets or Amazon S3 by itself. Reach for Make when the data needs shaping, filtering, or routing to more than one place.
Launch a scrape when something happens elsewhere
- Trigger on your own event
Start with any Make trigger — a new row in a sheet, a new form submission, a webhook, a schedule.
- Launch the run
Add Launch a Run and pick the batch to start.
Launch a Run spends credits, and a Make scenario can fire far more often than you'd click Launch by hand. Put a filter before the module, or use a batch whose task list is small, so a runaway trigger doesn't drain your balance.
Things to know
- Runs launched from Make are ordinary runs. They show up in your dashboard, count against your slots, and draw down the same credit balance.
- Every run re-processes every task in the batch's list. Make doesn't change that — if you want a run to scrape only new inputs, empty the task list and add fresh tasks before launching.
- Results are paginated. For a large run, let Make iterate through the pages rather than expecting one bundle.
- Results expire. Run results can be downloaded for 7 days on Free, 45 days on Starter and Pro and 90 days on Team and Business (the run's
expires_at), so fetch them before that.